Step 1
Log in to your account and go to Websites from the main left hand menu.
Step 2
Find the website where you want to change the Uptime alert settings.
Step 3
You will now be shown the Website Area.
From the inner menu select Uptime.
Step 4
Across the top, click on the Alerts tab.
Step 5
There are 2 different alert settings that you can customise:
- How you want to be notified
- How often notifications should be sent
Step 6
Email notifications will always be a notification option. To select which teammates should receive Uptime email notifications, simply choose them from the dropdown menu.
Note: You can select 1 or more teammates to receive notifications by email and, if you’re using the Reseller feature and would like people from your Reseller Agency’s team to also receive email notifications, you’ll be able to select them from the list too.

If you’ve connected your Slack workspace to Glow, you’ll also see an option to receive Uptime notifications to Slack.
Open the Slack accordion and select which Slack channel you want to receive Uptime notifications to.
Note: You can have notifications sent by both email and Slack.
Step 7
To customise when and how often notifications are sent, change the settings in the 2 dropdown menus in the Alert Rules section.
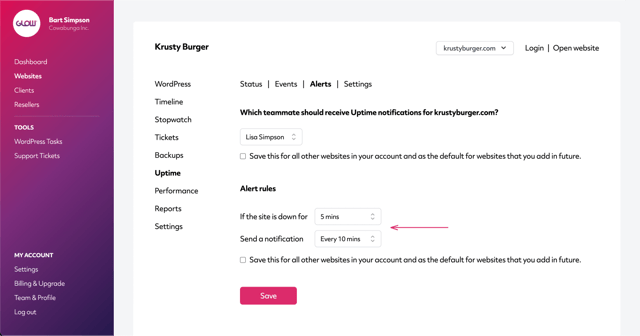
- The first dropdown –
If the site is down for – allows you to dictate when you receive the website ‘Down’ notification. Leave it as 0 mins and notifications will be sent as soon as Glow marks the site as Down. Change it to, for example, 5 mins, and Glow will send a notification only once the site has been Down for 5 mins.
- The second dropdown –
Send a notification – allows you to dictate how often the website ‘Down’ notifications are sent. Leave it as Once, and Glow will only send one notification. Change it to, for example, Every 10 mins, and Glow will send a notification every 10 mins until the website is back online.
Use these in combination to set your desired alert rules.
