Step 1
Log in to your Glow account and click on Settings from the main left hand menu.
Step 2
Click on White Label from the inner menu.
You’ll now see 3 tabs across the top:
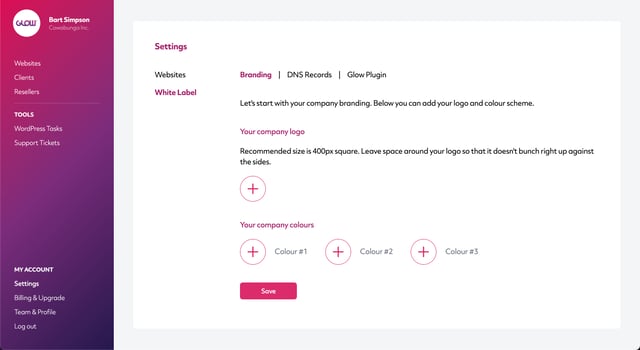
The Branding tab will load by default.
Step 3
Start by adding your logo.
Beneath where it says Your company logo, click the plus icon.
A popup will appear and you’ll now be able to select an image file from your computer.
Tip: Make it a square version of your logo, ~400px square and leave some whitespace around the logo so that it doesn’t bunch up right against the sides.
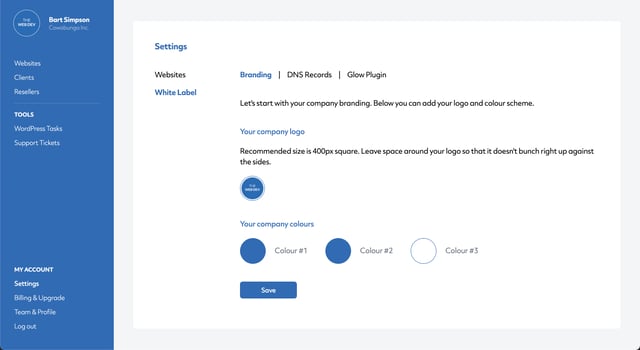
Once you’ve selected your file, you’ll notice your logo appear in place of where the plus icon was showing previously.
Step 4
Now add your company colours.
Beneath where it says Your company colours, click on each of the 3 plus icons to set your 3 colours.
A colour picker will appear each time you click a plus icon.
Note: Depending on your browser, you might not be able to paste in your HEX colour values. The colour picker uses your browser default and in some browsers, the paste function is not available.
Step 5
When you’ve done that, click on the Save button at the bottom of the screen.
Step 6
You’ll now see a success message confirming that the settings have been saved and you’ll also notice that the new colour scheme has gone live, as well as your logo showing in the top left corner.
