Step 1
Log in to your Glow account and go to Websites from the main left hand menu. Then click on the website where you want to setup Backups.
Step 2
You will now see the Website Area. From the inner menu, select Backups.
Step 3
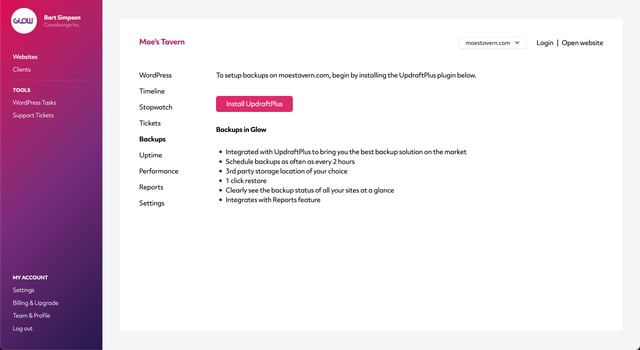
On the Backups screen you will see a setup message. Click on the Install UpdraftPlus button.
Step 4
Glow will now install UpdraftPlus on your client’s website. This can take up to 30 seconds to complete. Once it’s finished, you’ll see a new screen where you configure the backup schedule for both the website files and database:
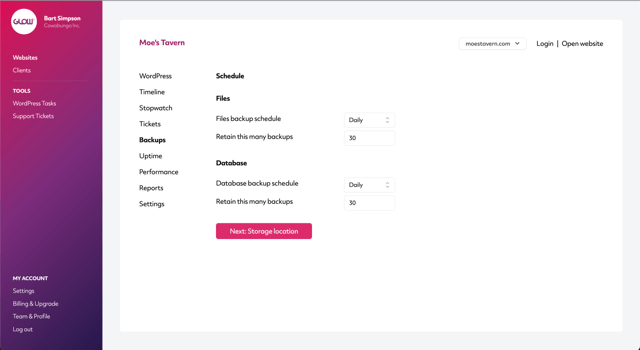
When you’ve set the schedule, click on the Next: Storage location button at the bottom of the screen.
Step 5
The next screen explains that you’ll configure your storage location in the UpdraftPlus settings from within WordPress.
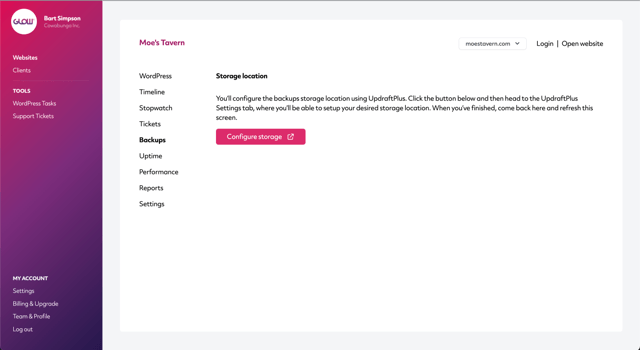
Click the Configure storage button to be taken to WordPress.
Step 6
Now you’re in WordPress on the UpdraftPlus Settings screen.
At the top, you’ll see the schedule that you created in Step 4 above.
Just below that, you’ll see various 3rd party storage locations that you can choose from to store the backup files for your client’s website.
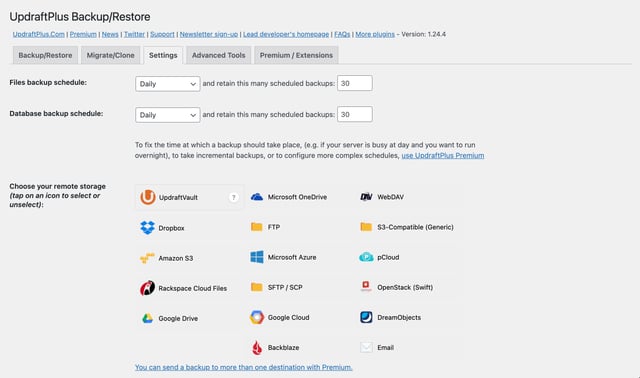
Select one of the storage locations and simply follow the on-screen instructions.
Step 7
Now scroll down below the storage location settings and click the link that says Show expert settings.
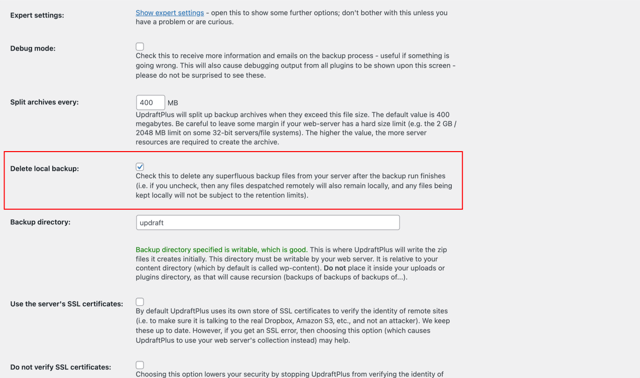
Find the setting named Delete local backup and make sure the checkbox is ticked.
Making sure the Delete local backup checkbox is ticked ensures that UpdraftPlus does not leave a copy of each backup on the server where your client’s site is hosted.
Step 8
Next, check that the schedule is setup correctly by clicking on the Backup/Restore tab at the top of the screen.
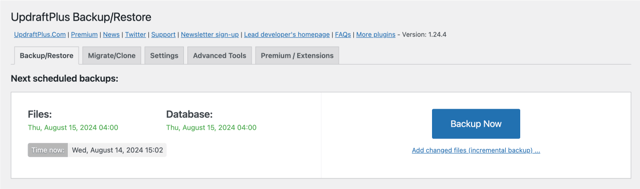
If it’s all setup correctly, you should see some green text, confirming the date and time of the next backup for both the files and the database.
Step 9
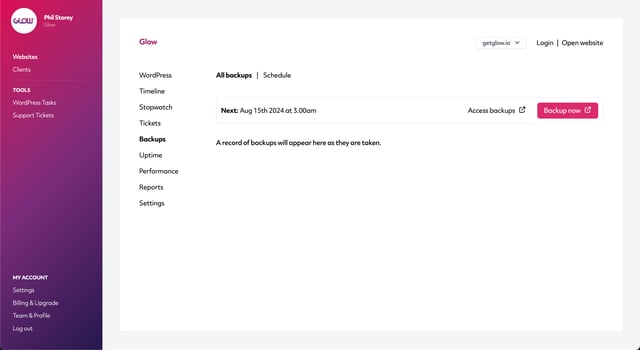
Once you’ve confirmed the schedule is all setup correctly and the 3rd party storage location has been configured, head back to Glow and refresh the screen.
Wait a few seconds and then you’ll see confirmation of the backup schedule with a note explaining that a record of each backup will appear on this screen as the backups are taken.