Step 1
Log in to your Glow account.
Step 2
Once logged in, click on Websites from the main left hand menu.
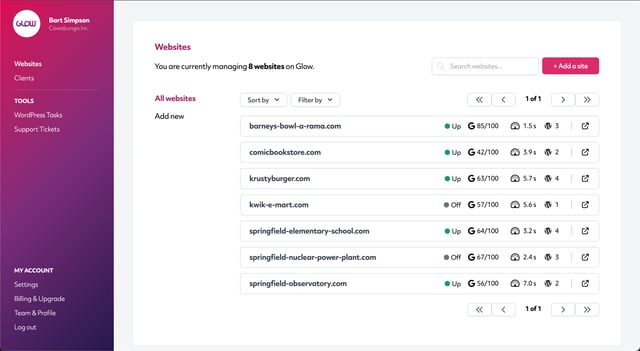
From the inner menu, click on Add new, or click the Add a site button in the top right corner.
Step 3
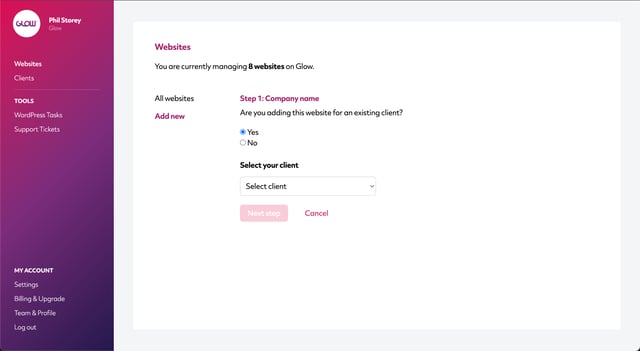
Glow will now ask you if the website you’re adding is for an existing Client in your account or whether it’s for a new Client.
If you choose Yes, you’ll be able to select the name of the existing Client from the dropdown menu that appears:
If you choose No, you’ll be able to type in the name of the new Client:
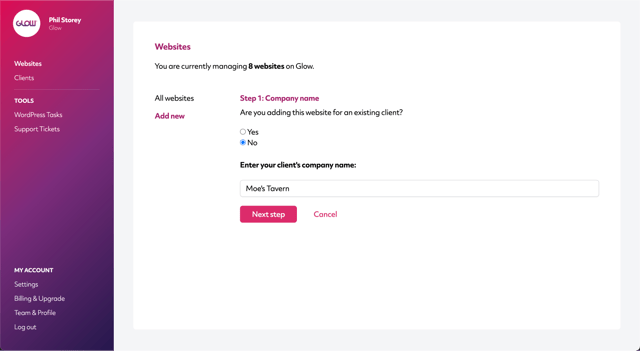
Click the Next step button.
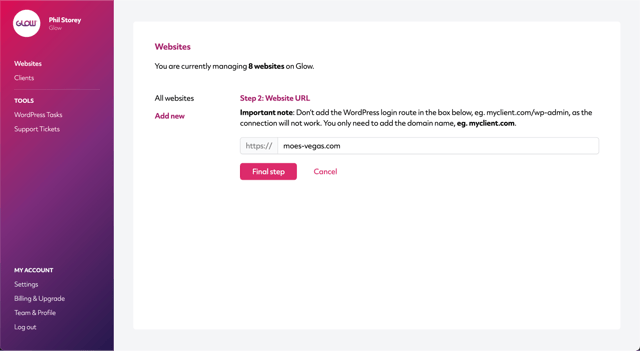
Step 4
You now need to add the URL of the new website you’re adding.
Note: Don’t add any forward slashes or the WordPress login route at the end of the domain name as the connection will not work correctly if you do. Add only the website URL itself.
- Examples that will work fine: clientwebsite.com, clientwebsite.co.uk
- Examples that will not work: clientwebsite.com/, clientwebsite.co.uk/wp-admin
Do this, then click the Final step button.
Step 5
Click on the Download Glow plugin button.
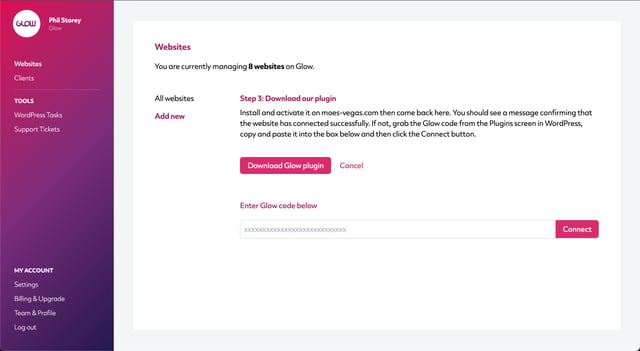
Install and activate our plugin on your client’s website.
Note: If you’ve already chosen to white label our plugin, once installed and activated on your client’s site, the plugin will always display your company’s name, not Glow. You don’t need to download a new white labelled version of our plugin.
Step 6
When you’ve done that, come back to Glow and you’ll notice the website is now connected.
If it’s not connected, grab the Glow code from WordPress on the Plugins screen and paste the code into the box provided in Glow.
Once the site’s connected, you’ll see a success message in Glow confirming that the process has been completed.
Step 7
Head back to the Websites screen and you’ll now see the new website you just added.
