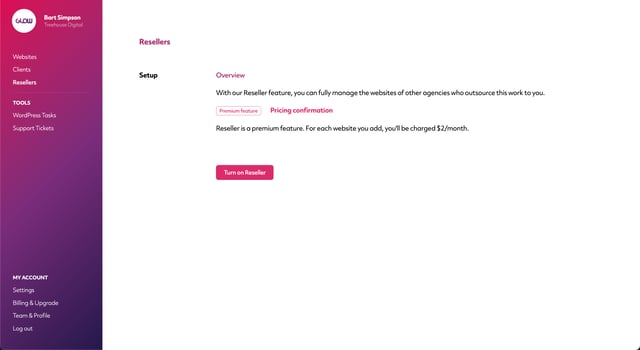
Step 1
Login to your account and go to Resellers in the main left hand menu.
Here you’ll see the Setup screen. To start the process, click the Turn on Reseller button.
Step 2
On the next screen you can add 1 or more of your Reseller Agencies using the text fields provided.
Use the plus and minus buttons on the right side to add and remove more fields as necessary.
When you’ve finished, click the Next step button.

Step 3
Now you need to choose how many Reseller websites you want to purchase.
Note: Reseller is a premium feature and you’ll be charged $2/website/month on for each Reseller website that you add, on top of your regular plan rate.
Use the number field to set the number of websites you want to add and then click the Final step button.

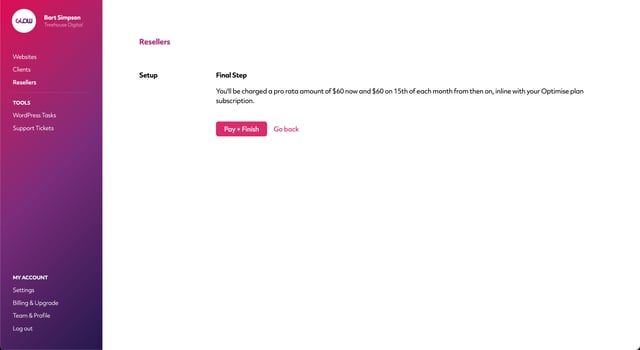
Step 4
Glow will now show you pricing confirmation, based on the number of sites you chose to add in the previous step. Confirm that you’re happy to proceed by clicking the Pay + Finish button.
Once the process has completed, you’ll see a success message on screen, confirming that Reseller has been setup.
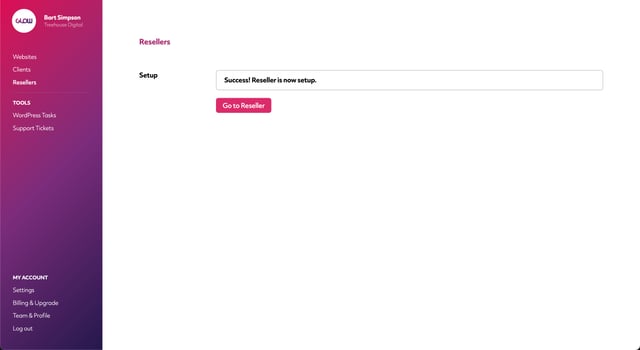
Step 5
Click on the Go to Reseller button to be taken to the Resellers section of your account. The All Resellers screen will load by default, where you’ll see a list of the Reseller Agencies that you added at the beginning of the setup process.
You can now start adding websites for your Reseller Agencies.
